Overview
This tutorial illustrates how to create a simple, responsive resume page for your personal website using Gatsby, Typescript and React function components. It assumes a basic knowledge of these three technologies. If that's not the case, check out these references before getting started:
- Set up your Gatsby development environment.
- Typescript in 5 minutes
- React Docs - Function and Class Components
Demo
Source code available here.
Set up boilerplate Gatsby site
Kick things off by creating a new Gatsby site using the gatsby-cli tool.
$ gatsby new typescript-resume
Enable Typescript
After the install script finishes, cd into the project directory and run gatsby-develop to run the site locally. After it finishes building, navigate to localhost:8000 in your browser to see the boilerplate starter site.
Gatsby provides drop-in support for Typescript via gatsby-plugin-typescript. Let's add this to the site. From the project directory, run:
$ npm i gatsby-plugin-typescript
And modify your gatsby-config.js to include the plugin:
module.exports = {
  // ...,
  plugins: [...`gatsby-plugin-typescript`],
}
That's it! Now you can use files with a .tsx extension in your project.
Create /resume route for your site
As the Gatsby docs state:
Any React component defined in
src/pages/*.jswill automatically become a page.
With Typescript enabled on the project, this statement can be updated to:
Any React component defined in
src/pages/*.[js|tsx]will automatically become a page."
(Note: the .tsx extension as opposed to just .ts. This is because the resume page we create will use JSX, thus we want the .tsx extension.)
Create a new page at src/pages/resume.tsx and add the following code to it:
import React from 'react'

/** Responsive resume page. */
const Resume = () => <h1>Hello, Resume!</h1>

export default Resume
Let's see it in action. Run gatsby develop again from project directory and navigate your browser to localhost:8000/resume. You should see:
Typescript Primer
You probably noticed the code above isn' actually using Typescript 🤔 Why did it still compile? It's because Typescript is a typed superset of Javascript. Which is a fancy way of saying, "All Javascript is valid Typescript, but not all Typescript is valid Javascript." Typescript simply optional static typing to the language.
This is a cool thing because it enables incremental integration of Typescript into an existing project. One could change all existing .js files to .ts|.tsx and incrementally add typings to them, or, leave all legacy .js files unchanged and use .ts|.tsx for any new files.
I digress. Back to the matter at hand: let's add some typings to Resume function component.
The syntax for adding Typescript typings is simple: identifier : type. A quick concrete example:
Consider three variables: x, y and z.
x and y are numbers, z is a string. Using the syntax above, the variables can be declared like this:
const x: number = 2
const y: number = 3
const z: string = 'Howdy!'
Now, let's say we have a function, add, that accepts two arguments which are both numbers. The typed function definition would look like this:
const add = (left: number, right: number) => left + right
Finally, consider if we tried to use the add function with the following two combinations of the variables declared above:
console.log(add(x, y))
console.log(add(x, z))
If you put all the statements in the example above into a file and tried to compile it with tsc, the Typescript compiler, you'd see the following error:
$ tsc test.ts
$ test.ts:8:7 - error TS2345: Argument of type 'string' is not assignable to parameter of type 'number'.

8 add(x,z)
Using the type declarations, tsc is smart enough to catch the invalid function call.
Side note: If you wrote the code above in plain JS, it would compile with no problem and it would output:
5
;('2Howdy')
Javascript is fun like that.
Actually use Typescript
With that ultra-brief primer on types, let's add types to the Resume function component in resume.tsx.
To do this, we'll need to import the FunctionComponent type declaration from the React library. Update the import section of resume.tsx to be:
import React, { FunctionComponent } from 'react'
And now update the Resume function to use this type definition.
/** Responsive resume page. */
const Resume: FunctionComponent = () => <h1>Hello, Resume!</h1>
Save and refresh the page on your browser. Ta-da! You've successfully used Typescript.
Define types for Resume data
Consider the "shape" or a resume. It might look something like this:
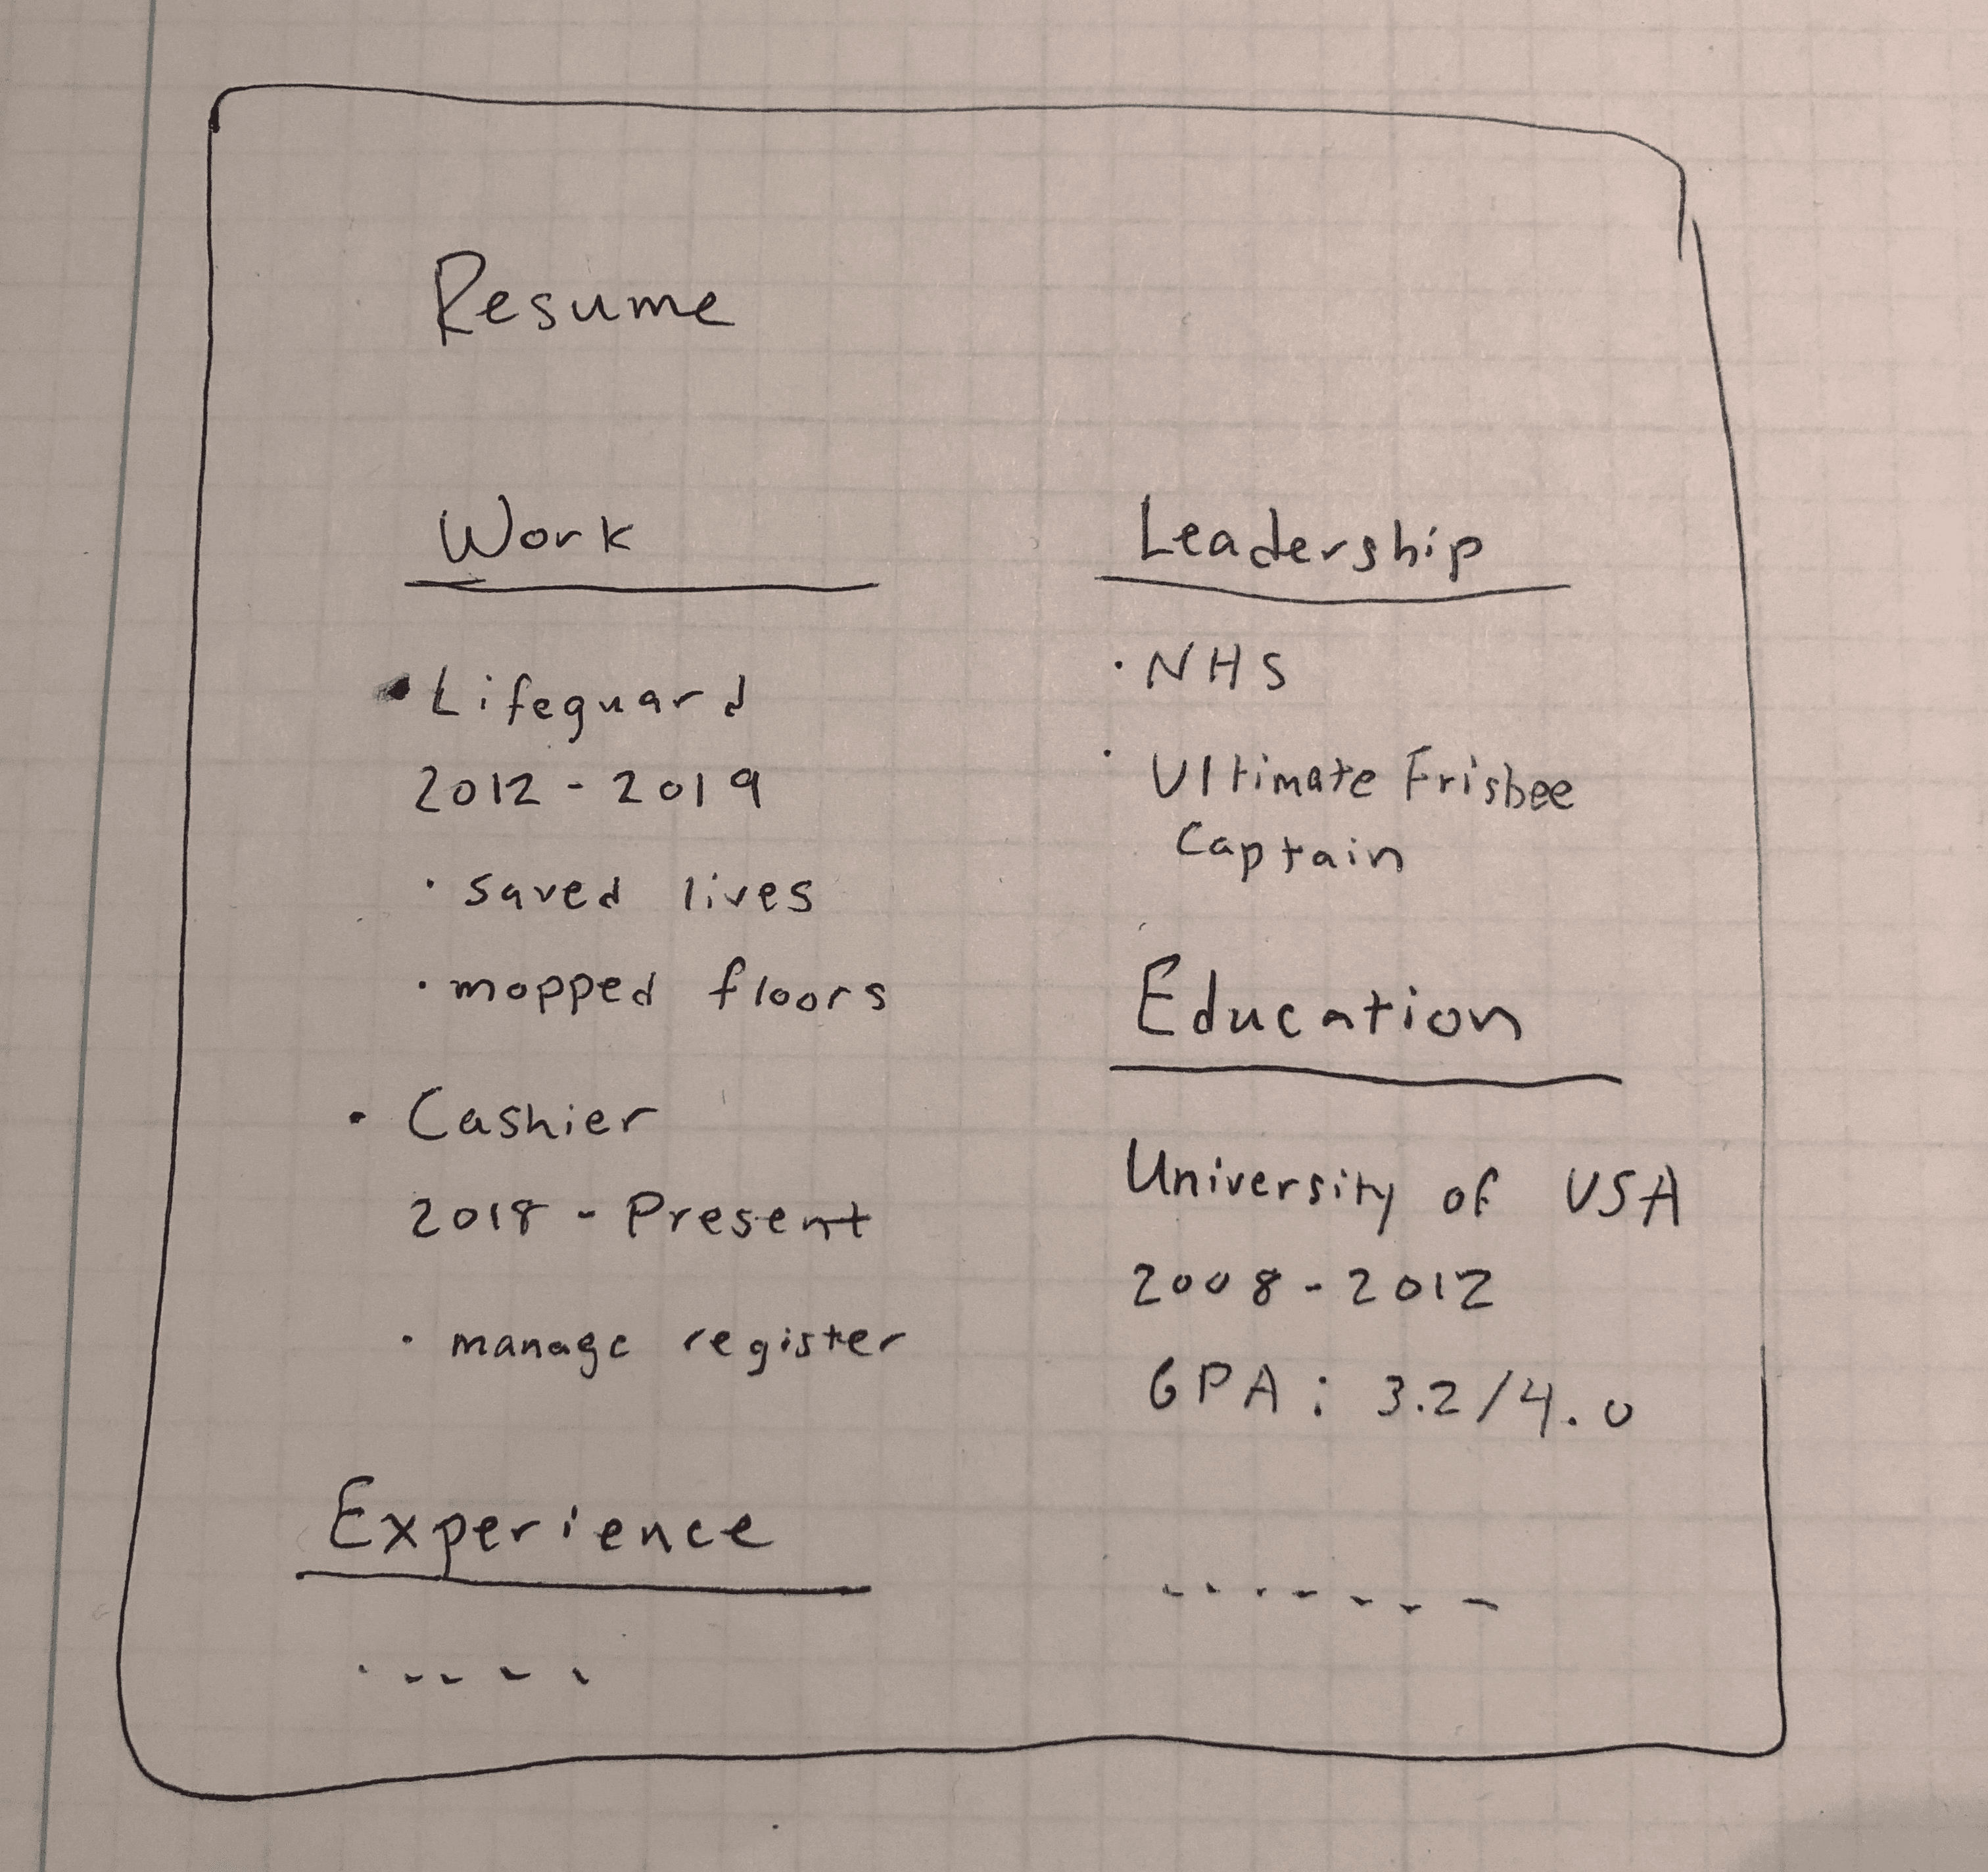
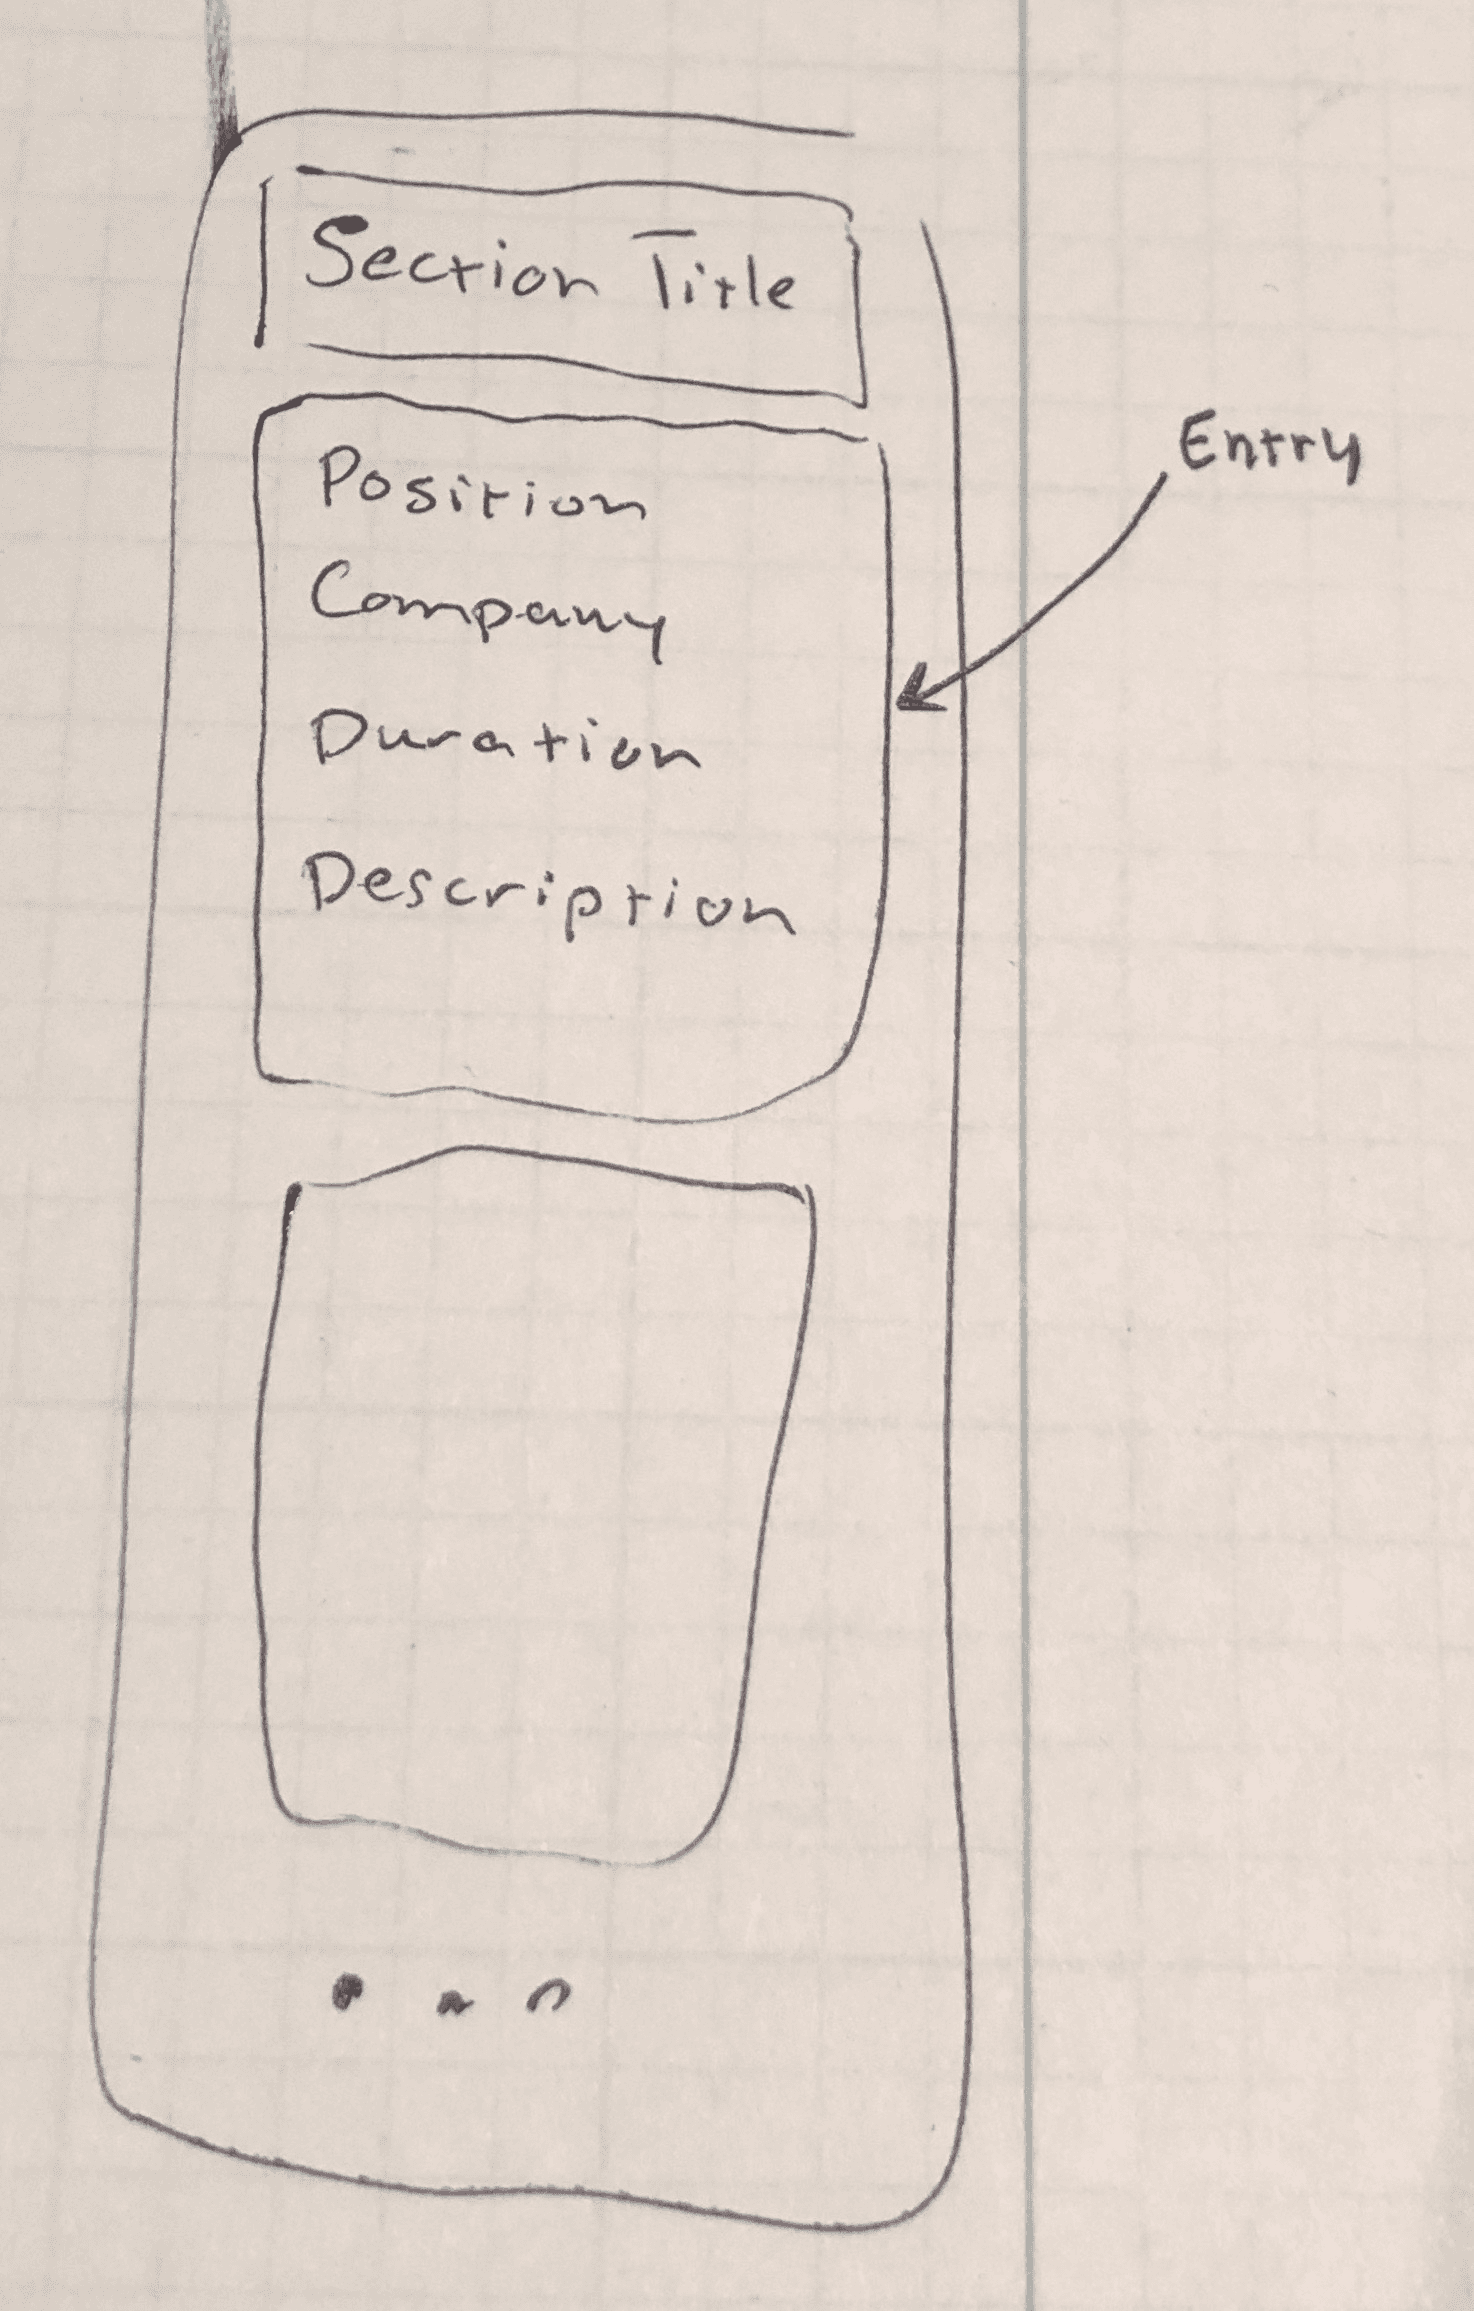
It consists of multiple sections like "work", "leadership", "education", etc. Each of those sections consists of one or more entries related to that section. Finally, entry consists of details like name of the position, company/organization, duration, description of responsibilities, etc.
Pretty simple, but one special case to note. Look at the "leadership" section above. It illustrates a case of a section with a single entry which is itself a list of items. Another use case for a section like this: adding a "Programming languages" to the resume, where one simply lists the langauges/frameworks with which they have experience.
Generalizing the example above into a generic section, we get something like:
Let's translate those statements above into Typescript types.
Enter: Interfaces
In Typescript, the interface keyword is used to declare types. The Typescript docs provide a nice explanation of the motivation for using interfaces:
"One of TypeScript’s core principles is that type checking focuses on the shape that values have. This is sometimes called “duck typing” or “structural subtyping”. In TypeScript, interfaces fill the role of naming these types, and are a powerful way of defining contracts within your code as well as contracts with code outside of your project."
Let's define the types "top-down." We start with saying what a Resume is and breaking it down into sub types until we get to types that consist of all primitives.
Within the src directory of your Gatsby project, create a new file resume.d.ts. The .d.ts denotes a file that contains type declarations. Add the following type declarations:
export interface Resume {
  sections: [Section]
}

export interface Section {
  title: string
  entries: [Entry]
}

export interface Entry {
  title?: string
  company?: string
  duration?: Duration
  description: string | [string]
}

export interface Duration {
  start: string
  end: string
}
What does this say? Exactly what we said above:
- A
Resumeis an array ofSections. - A
Sectionis atitlestring and an array ofEntryobjects. - An
entrycan have atitle,company,Duration, -- but all these fields are optional, hence the usage of the?. Thedescriptionfield is required, and it can be either a string OR an array of strings (hence the|). - A duration is
startand anend, both strings.
Define a typed data object
It's time to make a Resume data object that implements the types defined above.
Note: when I say "data object," I really just mean a plain ole' javascript object.
You can define your own data object or use the dummy data from the demo site (link). Either way, be sure to define this Resume data object in new file located at data/src/resume.ts in your project.
Create function components for each type
It can be useful to define tops in a "top down" manner, but I tend to think the opposite when it comes to actually implementing individual components. So, this section reads "bottom up", defining components for the simplest types first and composing them together until we arrive at the final Resume component.
A note on CSS
The main point of this tutorial is learning Gatsby, Typescript and React -- not so much learning CSS. We will talk about one CSS rule in particular later in the tutorial, but other than that, I won't show any of the CSS for the code snippets below. Choose one of the following options to add CSS to your project:
- Define your own styles in a
resume.cssfile (in the same directory as theresume.tsxfile) and define your own styles for each component as you go along. - Use the
resume.scssand base styles from the demo site. To do this, enable scss on the site and then copy the relevant files from the demo site into your project (here and here).
Import all dependencies into resume.tsx
In preparation for the components we'll define below, update resume.tsx to include the following imports:
import { graphql, StaticQuery } from 'gatsby'
import React, { FunctionComponent } from 'react'
import Layout from '../components/layout'

import { Duration, Entry, Resume, Section } from '../@types/resume.d.ts'
import data from '../data/resume'
import './resume.scss'

/** Responsive resume page. */
const Resume: FunctionComponent = () => <h1>Hello, Resume!</h1>
Don't worry if you don't recognize some of these components or imports. We'll talk about them later.
Entry
Let's define the RenderEntry component -- a single entry in a section. Add the following function component to resume.tsx.
/** A single entry, either a job entry or a list of skills. */
const RenderEntry: FC<Entry> = ({ title, link, company, duration, description }) => {
  const header = (
    <>
      <h4 className="job-title">{link ? <a href={link}>{title}</a> : title}</h4>
      {company && <h4 className="job-title">{company}</h4>}
      {duration && (
        <div className="duration">
          <i>{`${duration.start} - ${duration.end}`}</i>
        </div>
      )}
    </>
  )

  const body = Array.isArray(description) ? (
    <ul className="languages">
      {description.map((item, i) => (
        <li key={`languages-${item}-${i}`}>{item}</li>
      ))}
    </ul>
  ) : (
    description
  )

  return (
    <div className="job">
      {header}
      <div className="description">{body}</div>
    </div>
  )
}
The first section creates a React fragment for the entry header. It includes an "maybe linked" title by using the ternary operator, and two conditionally rendered sections -- company and duration -- using the logical && operator.
The second section creates the entry body. It similarly using type of the description prop to decide whether to render the description as a list, or just a regular paragraph.
Section
The RenderSection function much simpler to render. It is simply a list of entries with a title. Add the following to resume.tsx:
const RenderSection: FC<Section> = ({ title, entries }) => {
  return (
    <section>
      <h2 className="section-title">{title}</h2>
      <div className="section-bar" />
      {entries.map((entry, i) => (
        <RenderEntry key={`${title}-entry-${i}`} {...entry} />
      ))}
    </section>
  )
}
It maps over the supplied entries, rendering a keyed RenderEntry component for each one. Note the usage of the section html element to give our DOM some semantic meaning.
Resume
Update the placeholder Resume component we defined at the beginning of the tutorial with the following:
const RenderResume: FC<Resume> = ({ sections }) => {
  return (
    <>
      <div className="resume-body">
        {sections.map((section) => (
          <RenderSection key={`section-${section.title}`} {...section} />
        ))}
      </div>
    </>
  )
}
Pulse Check
We've defined the main components -- Entry, Section and Resume. Let's render them with some real data and make sure it's working as expected. We'll do this by wrapping the resume in a Layout component.
Wait, what's a Layout component? Where did this come from?
In Gatsby, layouts represent sections of your site that you'd like to share across multiple pages, like headers and footers. You can "wrap" pages in these layouts to avoid redefining the same header and footer on each new page you add to your site.
The boilerplate code generated by gatsby new my-project-name includes a simple layout component; we'll use that instead of defining our own. You should already have the Layout component imported.
Update resume.tsx to match what is shown below:
import { graphql, StaticQuery } from 'gatsby'
import React, { FunctionComponent } from 'react'
import Icon from '../components/icon'
import Layout from '../components/layout'

import { Duration, Entry, Resume, Section } from '../@types/resume.d.ts'
import data from '../data/resume'
import './resume.scss'

const Page: FunctionComponent = () => {
  return (
    <Layout>
      <RenderResume {...data} />
    </Layout>
  )
}

const RenderResume: FunctionComponent<Resume> = ({ sections }) => {
  return (
    <>
      <div className="resume-body">
        {sections.map(section => (
          <RenderSection key={`section-${section.title}`} {...section} />
        ))}
      </div>
    </>
  )
}

/** Renders a section, a titled list of entries. */
const RenderSection: FunctionComponent<Section> = ({ title, entries }) => {
  ...
}

/** A single entry, either a job entry or a list of skills. */
const RenderEntry: FunctionComponent<Entry> = ({
  title,
  link,
  company,
  duration,
  description,
}) => {
  ...
}

export default Page
Notice the addition of new top-level Page component, which wraps RenderResume in the Layout. Also notice that we're actually passing the data object via the JSX spread operator.
Navigate to localhost:8000/resume to check it out. It should look similar to this:
Title Component
Let's add the final component, the ResumeTitle, which makes use of some icons and the Gatsby StaticQuery component. It will look like this:

A Gatsby StaticQuery allows components to retrieve data via GraphQL query.
Surprise: you're already using StaticQuery and you didn't even realize it. Let's take a look at src/components/layout.js:
import React from 'react'
import PropTypes from 'prop-types'
import { StaticQuery, graphql } from 'gatsby'
import Link from 'gatsby-link'

import './layout.scss'

const Layout = ({ children }) => (
  <StaticQuery
    query={graphql`
      query SiteTitleQuery {
        site {
          siteMetadata {
            title
          }
        }
      }
    `}
    render={(data) => {
      const { title } = data.site.siteMetadata
      return (
        <>
          <div className="container">
            <main>
              <Link to="/" css={{ display: `inline-block` }}>
                <h1 className="site-title">{title}</h1>
              </Link>
              <hr />
              {children}
            </main>
            <footer>
              <div>{`© ${new Date().getFullYear()} ${title}`}</div>
            </footer>
          </div>
        </>
      )
    }}
  />
)

Layout.propTypes = {
  children: PropTypes.node.isRequired,
}

export default Layout
The component uses a StaticQuery to fetch the site title from the site's metadata object. Where is this metadata? In the gatsby-config.js at the root of the project. Conveniently, we'll use a nearly identical query in the ResumeTitle component. Update the siteMetadata to include relevant links/contact methods which you're comfortable sharing.
module.exports = {
  siteMetadata: {
    title: `Gatsby Typescript Resume`,
    description: `A simple, responsive resume using Gatsby and Typescript.`,
    author: `John Doe`,
    location: `New York, NY`,
    email: `johndoe123@gmail.com`,
    github: `https://github.com/gatsbyjs`,
    linkedin: `https://www.linkedin.com/company/gatsbyjs/`,
    medium: `https://medium.com/search?q=gatsby%20js`,
  },
  ...
}
Copy the icon.tsx and icon.scss files from the demo site to the components folder of your site. They are available here and here.
Note: the Icon component only supports email, github, linkedin and medium right now. Feel free to extend it to include other logos!
Next, update resume.tsx to import the Icon component:
import { graphql, StaticQuery } from 'gatsby'
import React, { FunctionComponent } from 'react'
import Icon from '../components/icon' // highlight-line
import Layout from '../components/layout'

import { Duration, Entry, Resume, Section } from '../@types/resume.d.ts'
import data from '../data/resume'
import './resume.scss'
And lastly, add the following component in resume.tsx:
const ResumeTitle: FC<> = () => {
  return (
    <StaticQuery
      query={graphql`
        query {
          site {
            siteMetadata {
              author
              location
              description
              email
              linkedin
              github
              medium
            }
          }
        }
      `}
      render={(data) => {
        const { author, location, email, github, linkedin, medium, description } =
          data.site.siteMetadata

        const iconsWithLinks = [
          ['email', `mailto:${email}`],
          ['github', github],
          ['linkedin', linkedin],
          ['medium', medium],
        ]

        return (
          <div className="resume-title">
            <h1 className="resume-name">{author}</h1>
            <div className="title-section-description">{location}</div>
            <div className="icon-section">
              {iconsWithLinks.map(([icon, href], i) => (
                <a key={`link-${i}`} className="link-icon" href={href}>
                  <Icon key={`link-${i}`} name={icon} />
                </a>
              ))}
            </div>
          </div>
        )
      }}
    />
  )
}
The StaticQuery component accepts two props: query (what data you want to fetch) and render (how to render the data). Here, we grab all relevant fields from the site metadata and use those to render the title section.
Update RenderResume component to use SiteTitle:
const RenderResume: FunctionComponent<Resume> = ({ sections }) => {
  return (
    <>
      // highlight-next-line
      <ResumeTitle />
      <div className="resume-body">
        {sections.map((section) => (
          <RenderSection key={`section-${section.title}`} {...section} />
        ))}
      </div>
    </>
  )
}
Responsive column layout via CSS
As a final step, let's make the resume layout responsive.
Consider the two main cases for laying out the sections of our resume: desktop view (large screen) and mobile view (small screen). It makes sense to use all available real estate on each screen:

How can we do this? column-count and column-width to the stage.
column-count breaks an element's content into the specified number of columns, and column-width sets "the ideal column width in a multi-column layout." Used together, they create a responsive layout: 2 columns on large screens, one column on narrow screens.
Add the following to to resume.css (or resume.scss) file:
.resume-body {
  -webkit-column-count: 2;
  -moz-column-count: 2;
  column-count: 2;
  -webkit-column-width: 256px;
  -moz-column-width: 256px;
  column-width: 256px;
  -webkit-column-rule: 1px dotted $fff;
  -moz-column-rule: 1px dotted $fff;
  column-rule: 1px dotted $fff;
}
Refresh the page and check out resume. It should look like this:
If there's enough room on screen to accommodate two columns with a minimum width of 256px, it does so. Once that that's not possible, it switches back to a single column.
Wrap up
That's it! You've successfully made a sleek looking resume page for your personal website by leveraging Gatsby, Typescript and React. Some closing thoughts:
- Typescript makes it easier to break down the "shape" of the data in your projects. It informs decisions on how to best break down a view into individual components.
- React function components are a succinct alternative to class-based components, and, with the introduction of
useStatehook in React 16.8, can be stateful! Additionally, the React team briefly mentioned that they may be able to make performance optimizations on function components in the future. - Gatsby makes it easy to spin up websites quickly because of its "plug n play" nature: there are over 1200 plugins available!
Have a question or comment on the tutorial? Shoot me an email. Thanks!